How to Create a System Repair USB Tool for Windows 7?
- admin
- 2016-08-16 09:37:13
- 2,814
Most computers and laptops on a larger scale come with a system recovery disc that you can use when your device needs to be repaired or recovered. However, netbooks and small size notebooks do not offer CD or DVD drive, so it can't be fixed with this type of disc.
You can make up a system repair USB key to use on devices which do not offer CD or DVD drives.Create a System Repair USB Key on Windows 7
You will need a bootable usb key with a free space of over 165MB.
Preparing the USB Key
Open the command prompt by going in to Run.exe and then write CMD in space given and hit enter key. Next enter Diskpart and open the Diskpart tool. Now select the serial of your assigned USB from the list which appears and select the USB key Serial and click clean.
This procedure will format this partition and to create a new one, enter create active partition. Now you will have an active bootable partition. Select format options FAT32 quick and click on assign. Now exit the diskpart.
Display Hidden Files and Folders
Open My Computer from start menu. Click on view in the menu bar and then go to view options and click on Folder options. Next go to the view tab and check the box which says show all hidden files and folders.
Creating Directories and Copying the Necessary Files
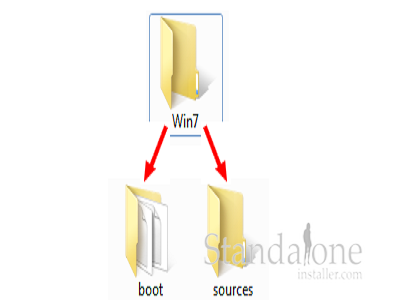
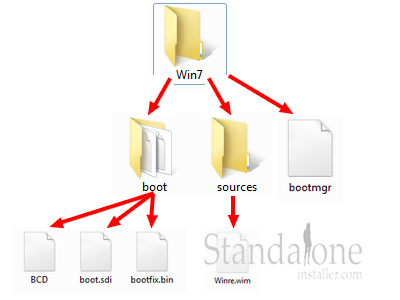
Create a new folder on your desktop named Win7. Open the folder, and create two new folders titled Boot and Sources:

Copy the C:Recovery486aab42-cf02-11de-be22-c44fb1debe9dwinre.wim file in the directory named Source.

Copy Win7 contents to your USB drive. Rename the BCD file to bcd and the winre.wim to boot.wim in your USB flash drive.
